
 US Dollars
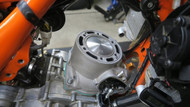
How to Tell When It's Time to Rebuild Your Two-Stroke Top End
Posted by Hank Caldera on Jul 22nd 2026
A two-stroke will tell you when something's wrong. That's the thing I appreciate most about these engines after thirty years of riding and wrenching on them. No sensors, no computer throwing a code, no dashboard light. Just a bike that starts feeling a little less alive than it used to, and if you're paying attention, you'll catch it long before it becomes a real problem.
Most riders don't catch it. They ride the bike into the ground, blame the gas, blame the jetting, blame the weather, and eventually limp it into a shop wondering why it won't pull like it used to. The answer is usually sitting right there in the top end the whole time.
Let's talk about how to actually listen to what your bike is telling you.
Why Two-Strokes Make This Easy
Compared to a four-stroke, a two-stroke top end is refreshingly simple. Piston, rings, cylinder, a couple of gaskets, and on modern bikes a power valve system. That's most of it. There's no cam chain, no valve train, no timing components to worry about up top. This simplicity cuts both ways: two-stroke top ends wear faster because the piston and rings are doing more cycles of work per revolution, but rebuilding one is a job most riders can do in a garage with basic tools and a Saturday afternoon.
Rebuilding a top end is maintenance. It is not a repair. That distinction matters. If you wait until the engine is making bad noises or spitting metal into the exhaust, you've turned a $150 maintenance job into a $600 repair. Stay ahead of it and it stays cheap and simple.
The Signs Your Top End Is Wearing Out
The bike feels flat. This is the big one. You know your bike. You know how it pulls, where the power comes on, what it feels like when you crack the throttle. When a top end starts going, that feeling changes gradually enough that you might not notice day to day, but you'll notice if you think back to how it felt a few months ago. Power fades before anything else does.
It kicks over too easily. If your bike used to have some resistance on kickstart and now spins over noticeably lighter, that's compression loss talking. The rings aren't sealing the way they used to, so the piston isn't building the pressure it should on the compression stroke.
You're seeing more smoke than usual. Some smoke is normal on a two-stroke, that's the nature of the oil mixing with fuel. A meaningful increase, especially smoke that looks different in color or thickness than what you're used to, is worth paying attention to.
Plugs are fouling more often. If you're pulling plugs and finding them black and fouled more frequently than they used to, something's off in the combustion process, and a tired top end is a common cause.
You're finding debris in the air filter or intake. This one's serious. A dirty or torn air filter lets dirt and grit get pulled into the engine, and that debris will chew up your cylinder wall from the inside. If you ever find dirt in the intake, stop riding and tear down the top end to check for damage before you do more harm.
Knocking or pinging sounds. Worn components rattling around where they shouldn't, or the engine running leaner than it should because of compression issues, can produce sounds that weren't there before.
One caveat on hard starting: a bike that's difficult to start, especially cold, isn't always a top end problem. Jetting, spark plugs, and fuel quality can all cause hard starting too. Don't assume the worst from that symptom alone. But combined with the other signs on this list, it adds up.
Run the Compression Test
This is the tool that turns a guessing game into an actual diagnosis.
A compression test tells you what's happening inside that cylinder in real numbers instead of vibes. Thread a compression gauge into the spark plug hole, hold the throttle wide open, and kick the engine through several times. The highest reading you get is the number that matters.
Most healthy two-stroke engines will read somewhere in the 120 to 180 psi range, though this varies by bike, displacement, and compression ratio, so check your manual for what's normal on your specific engine. What matters more than the raw number is the trend. If you establish a baseline reading when the bike is running well and log it, you can track how that number moves over time. A drop of roughly 15 to 20 percent from your baseline is a solid signal that the top end is wearing out and needs attention.
Do yourself a favor and run this test periodically, not just when you already suspect a problem. A baseline you took when the bike was fresh is worth more than a single reading taken after you're already worried.
How Long Does a Top End Actually Last?
This is one of those questions where the honest answer is "it depends," and anyone who gives you a firm number without asking follow-up questions is oversimplifying.
As a rough guideline, many riders get somewhere between 20 and 100+ hours out of a top end before it needs attention, with the piston generally outlasting the rings. A rider on a 125 who's holding the throttle wide open on a sand track all day is going to burn through a top end a lot faster than someone doing mellow trail rides on a 300. Displacement, riding style, air filter maintenance, and jetting all move that number around significantly.
Don't ride by the calendar. Ride by the compression test and by how the bike feels. That's a far more honest indicator than an hour count borrowed from someone else's riding style.
The Teardown
Once you've decided it's time, here's the general process. I'm giving you the shape of the job, not a bike-specific manual. Your service manual has exact torque specs, ring gap tolerances, and bolt patterns for your engine, and that's the document that overrides anything general I say here.
Start clean. Pull the seat and tank, and if you can, disconnect the carb and airbox boot so nothing falls into the intake while you're working. Wash the bike down, especially around the cylinder base and any nooks where mud and dirt like to hide. The last thing you want is trail grime falling into an open engine.
Remove the cylinder head, then the cylinder itself, sliding it up and off the piston. Take your time here. Stuff a clean rag into the case around the connecting rod so nothing drops into the bottom end while the top is open.
With the cylinder off, inspect it closely. You're looking for scoring, which are visible scratches running along the bore, and you're checking whether the cross-hatching pattern is still visible. That cross-hatch pattern comes from the honing process and it's what holds a thin layer of oil against the cylinder wall to lubricate and seal the rings. If that pattern is worn smooth, compression suffers even if you can't see obvious damage. A cylinder with light wear may just need honing. A scored or heavily worn cylinder may need replating.
Pull the circlips holding the wrist pin in place, carefully, since this tends to be the fussiest part of the whole job. Remove the piston and inspect it and the rings for wear, scoring, or excessive carbon buildup. While you're in there, this is also the right time to check and clean your power valve if your bike has one. These live in the exhaust port and get dirty fast, which causes them to stick and hurts performance in ways that can look a lot like a worn top end even when it isn't.
The Rebuild
If your cylinder needs honing or replating, that typically goes out to a specialist shop unless you've got the tools and experience to do it yourself. Once it comes back, clean it thoroughly. Warm soapy water and a bristle brush first, then a wipe with a lint-free rag, checking with a cotton swab until nothing comes back dirty. Leftover honing grit left in the bore will grind up your new rings fast, so don't skip this step or rush it.
New piston, new rings, new gaskets. Don't try to save money by reusing old rings on a new piston or vice versa, and don't just swap rings alone thinking you'll get the full benefit of a rebuild. You won't. Do the job right or don't bother.
Check the ring end gap before installation using a feeler gauge, filing gradually if needed to hit the spec your parts manufacturer or service manual calls for. Every manufacturer's spec is a little different, so don't assume the number from one bike applies to another. Measure piston-to-cylinder clearance too, using a bore gauge and micrometer, following the gauge points specified for your particular piston.
When you install the piston, there's an arrow stamped on the crown that typically points toward the exhaust side. Get this orientation right, it matters for how the rings sit relative to the exhaust port. Line up the ring end gaps with the locating pins in the ring grooves so they can't rotate into the ports and snag during operation.
Lubricate everything as you go: piston skirts, ring faces, and the cylinder wall, all coated in two-stroke oil before you slide the cylinder down over the piston. Compress the rings by hand as the cylinder passes over them, and don't force anything. If it feels wrong, stop and figure out why before you push harder.
Torque the cylinder base nuts and head bolts to spec, in the sequence your manual specifies. This is not a place to eyeball it. Under-torqued fasteners can lead to leaks or worse, and over-torqued fasteners can warp components you just paid good money to fix.
The One Thing I'll Repeat
Every number I've given you here, compression baselines, hour estimates, ring gaps, torque specs, is a general guideline built from common patterns across two-stroke engines. Your bike has an actual number, in an actual manual, specific to your actual engine. Find your owner's manual or service manual before you pick up a torque wrench. The manufacturer engineered that machine and wrote down exactly what it needs. Respect that over anything you read on the internet, including this.
When to Hand It Off
If your cylinder needs replating or you don't have access to a bore gauge and the other measuring tools this job calls for, there's no shame in taking the cylinder to a machine shop for that portion of the work and handling the rest yourself. Plenty of riders do the teardown, send the cylinder out for replating or honing, then handle reassembly themselves once it comes back. That's a completely reasonable way to split the job.
If you're not comfortable with any part of this process, a good motorcycle shop can handle the whole thing. It's worth paying for once if it teaches you what to look for next time.
Keep Listening
A two-stroke that gets a little attention when it asks for it will keep running strong for years. One that gets ignored until it's smoking, knocking, and down on power is one that's going to cost you more money and more downtime than it needed to.
Learn what your bike feels like when it's healthy. Run a compression test now, before anything feels wrong, and write that number down. Then check the air filter every single ride, because that habit alone prevents more top end damage than anything else on this list.
That's the whole secret, really. Pay attention, and the bike will keep telling you exactly what it needs.
Mad Lads Moto carries piston kits, gasket sets, ring gap tools, and compression testers for riders who'd rather stay ahead of a rebuild than get stuck doing an emergency one. Browse the shop and keep your top end honest.